
The Table of Contents Plugin is designed to help you add tables of contents to posts, pages and sidebars.
Once you’ve activated the table of contents plugin in plugins it automatically adds a table of content before the first heading on any page with four or more headings.
Extensive options for controlling the display position, minimum number of headings before the table of content is displayed, appearance and more can be customized in Settings > TOC+.
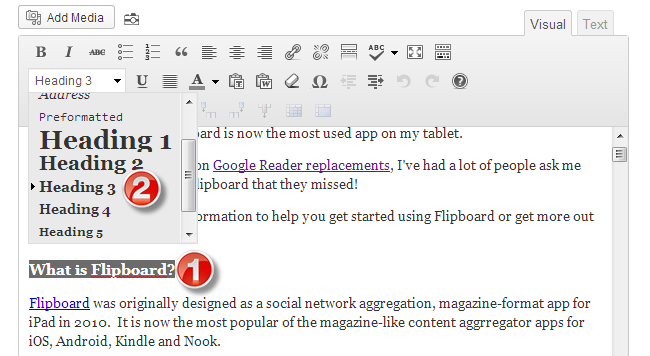
Adding Headings
Headings are used to break up posts and pages into manageable bit size chunks.
Creating a heading is as simple as:
- Highlight the text you want to change into a heading.
- Select the Heading Style you want to apply from the advanced formatting toolbar (you access the advanced formatting toolbar by clicking on the Show/Hide Kitchen sink icon) – for most themes your best option is Heading 3.
- Preview your post to make sure that headings has broken your post into manageable chunks.
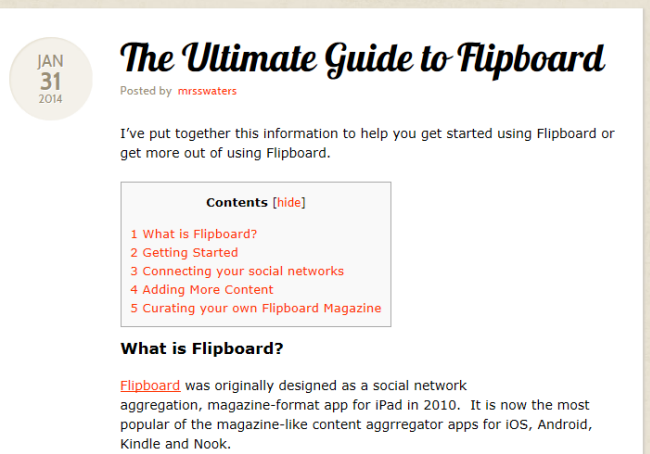
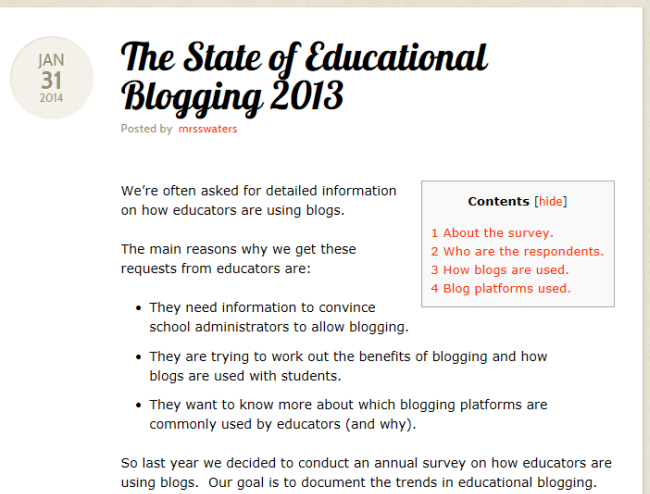
When the page is viewed the default table of content looks like this:
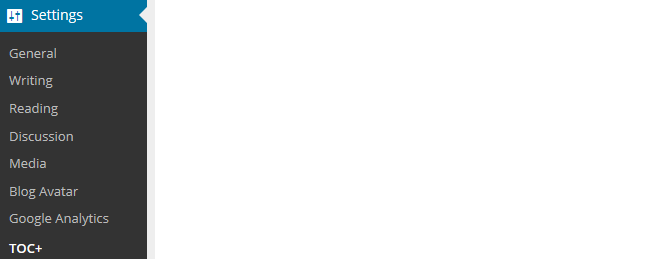
TOC+ Settings page
The TOC+ Settings page is where you configure and customize your table of contents.
Once you have activated the Table of Contents plugin you can configure it as follows:
1. Go to Settings > TOC+
2. Select where you want the table of contents to appear.

- Before first heading (default): the table of content appears just above the first heading on the post or page.
- Top: the table of content appears at the top of the content just below the post (page) title.
- Bottom: the table of content appears at the bottom of the content.
3. Select the minimum number of headings before a table of content appears.
By default, you must have four or more headings before a table of contents is added.

4. Select the content types you want table of contents to be automatically inserted into.
By default, the table of contents is added to pages only.

5. Customize how the table of content displays.
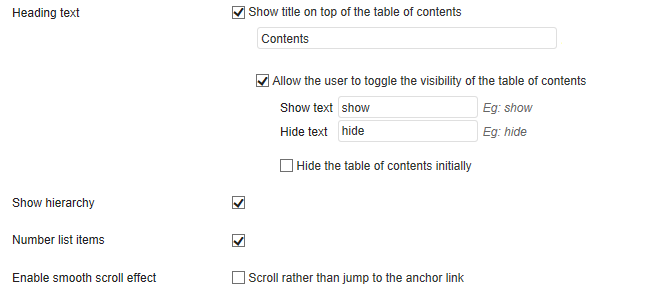
6. Customize the appearance of your table of contents.
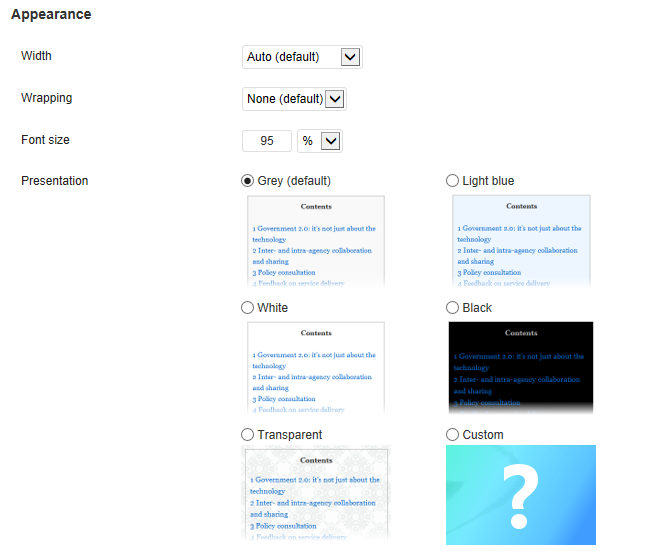
- Width: allows you to set the width of your table of content.
- Wrapping: controls if your table of content is left aligned or right aligned with text wrapped or has no text wrapping.
- Font size: controls the size of the font in the table of content.
- Presentation: allows you to change the appearance of your table of content.
TOC Shortcodes
The TOC Shortcodes allow you to fully control the appearance of table of contents.
You use the shortcode if you only want the Table of contents to appear in specific posts or pages, or want greater control of the position of your table of contents.
You can use the following attributes with the shortcode:
- label: text, title of the table of contents
- no_label: true/false, shows or hides the title
- wrapping: text, either “left” or “right”
- heading_levels: numbers, this lets you select the heading levels you want included in the table of contents. Separate multiple levels with a comma. Example: include headings 3, 4 and 5 but exclude the others with heading_levels=”3,4,5″
For example, I would use the following shortcode if I wanted to display a right aligned, text wrapped table of contents.

This is what my table of contents would look like:
The [no_toc] shortcode allows you to disable the table of contents for the current post or page.
TOC+ Widget
The TOC+ Widget allows you to display your tables of contents in the sidebar rather than your post or page.
It’s as simple as:
1. Go to Appearance > Widget in your Dashboard.
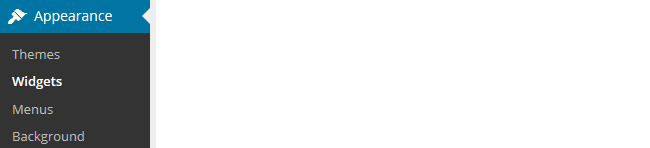
2. Drag the TOC+ widget from the Available Widgets into the desired Sidebar.
